At this stage, you should have finished the initial two tabs (Details and Recognition) out of the six tabs involved in crafting an event-driven promotion. You are now on the Outcomes tab (as illustrated in the screenshot below). The subsequent section provides a step-by-step walkthrough for completing the remaining three tabs: Outcomes, Eligibility, Schedule, and Review.
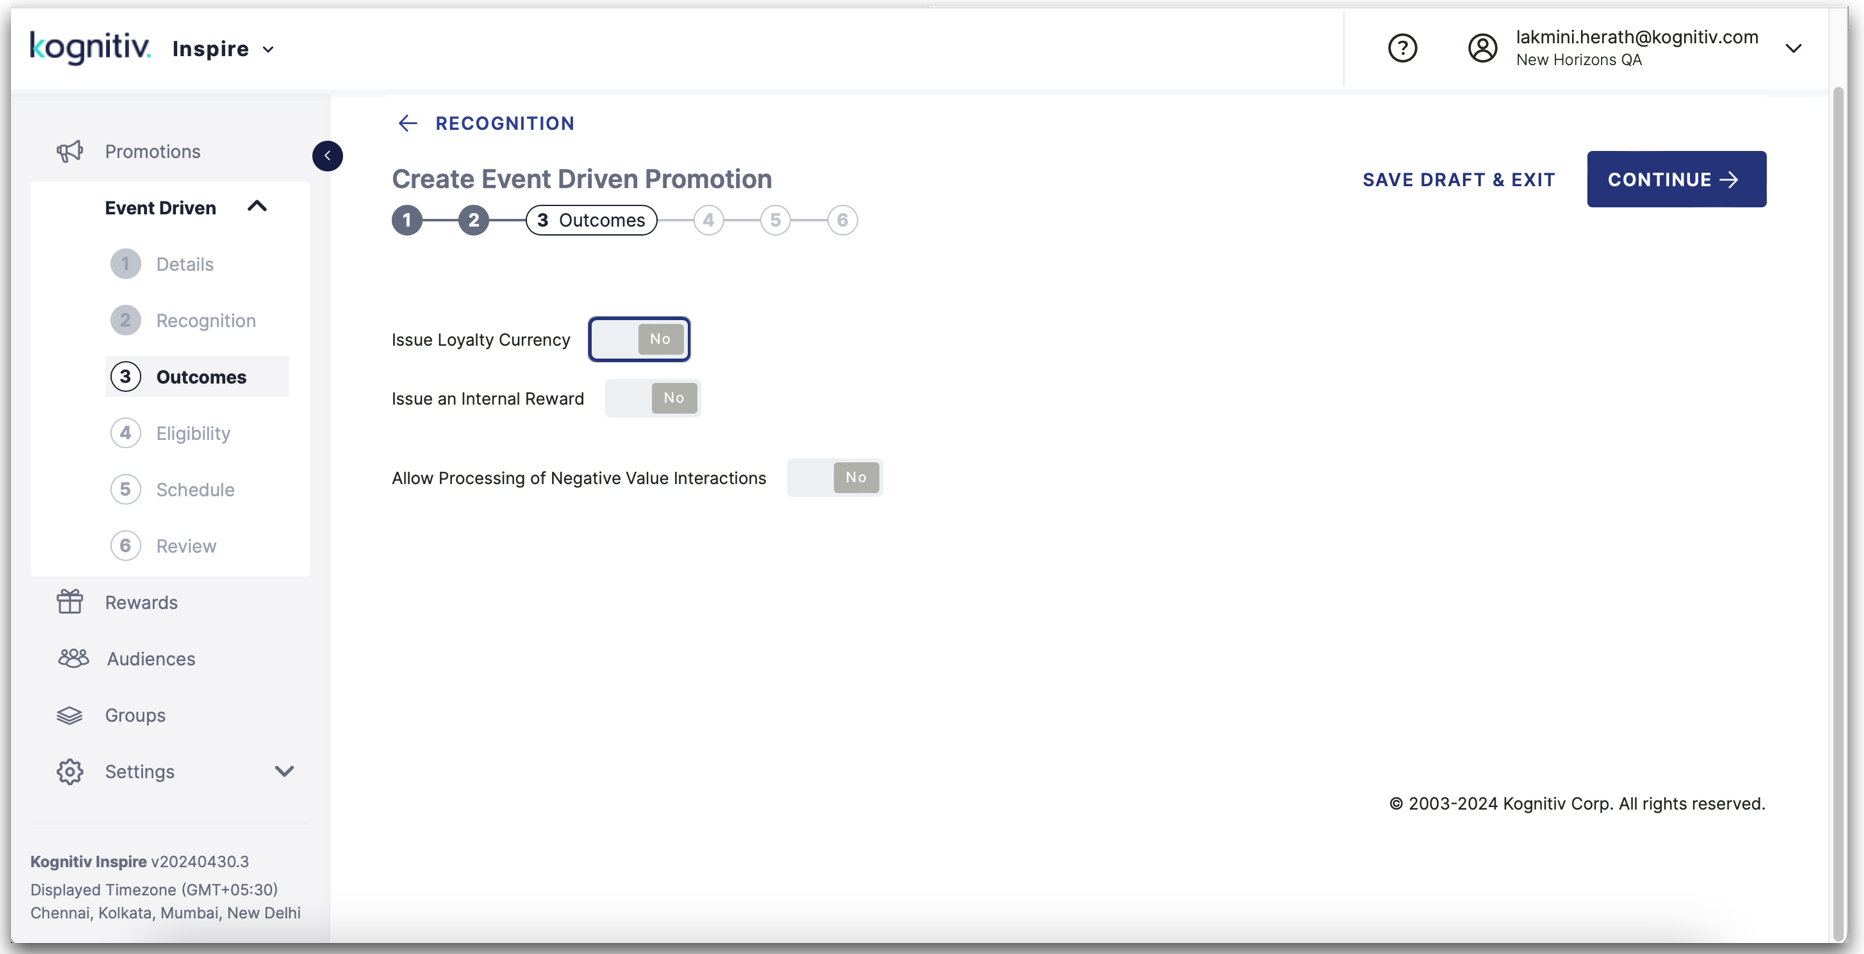
Outcomes tab (For Event Type: Reward Issued)
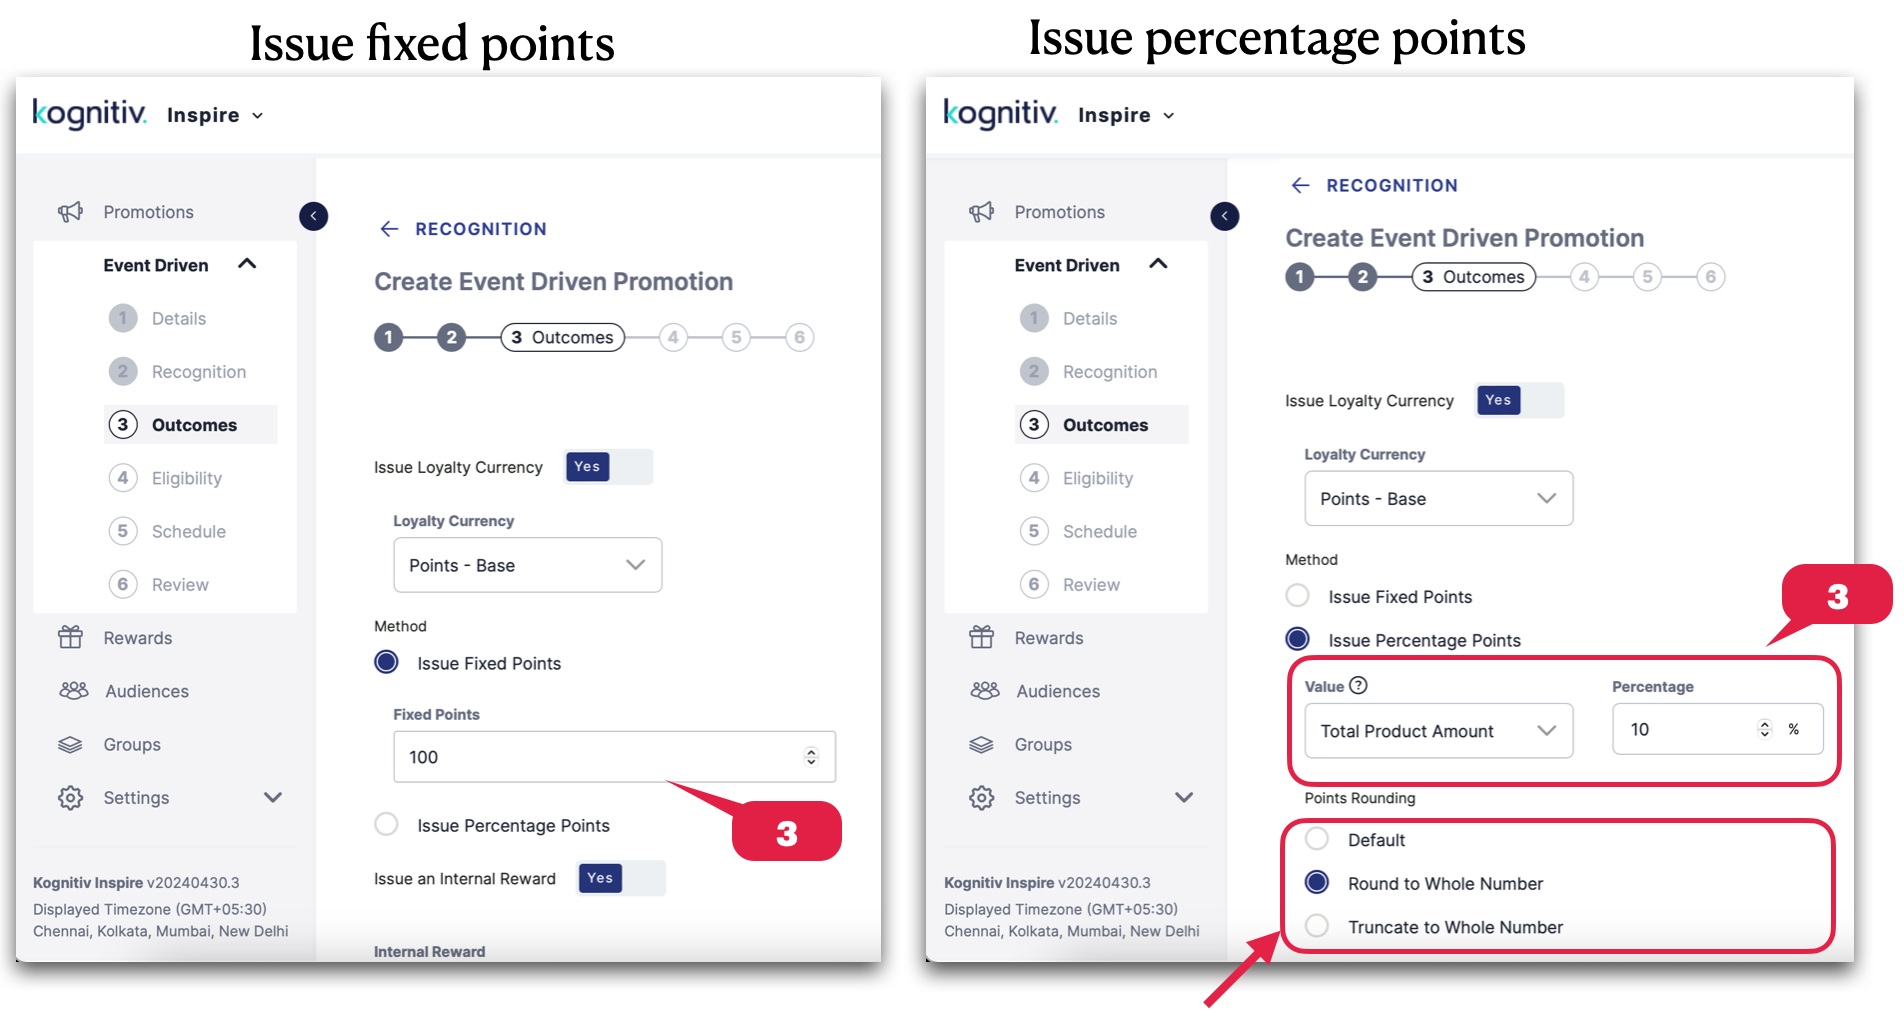
1. Choose the loyalty currency to be issued by selecting from the "Loyalty Currency" dropdown menu, which offers options, base points and bonus points.
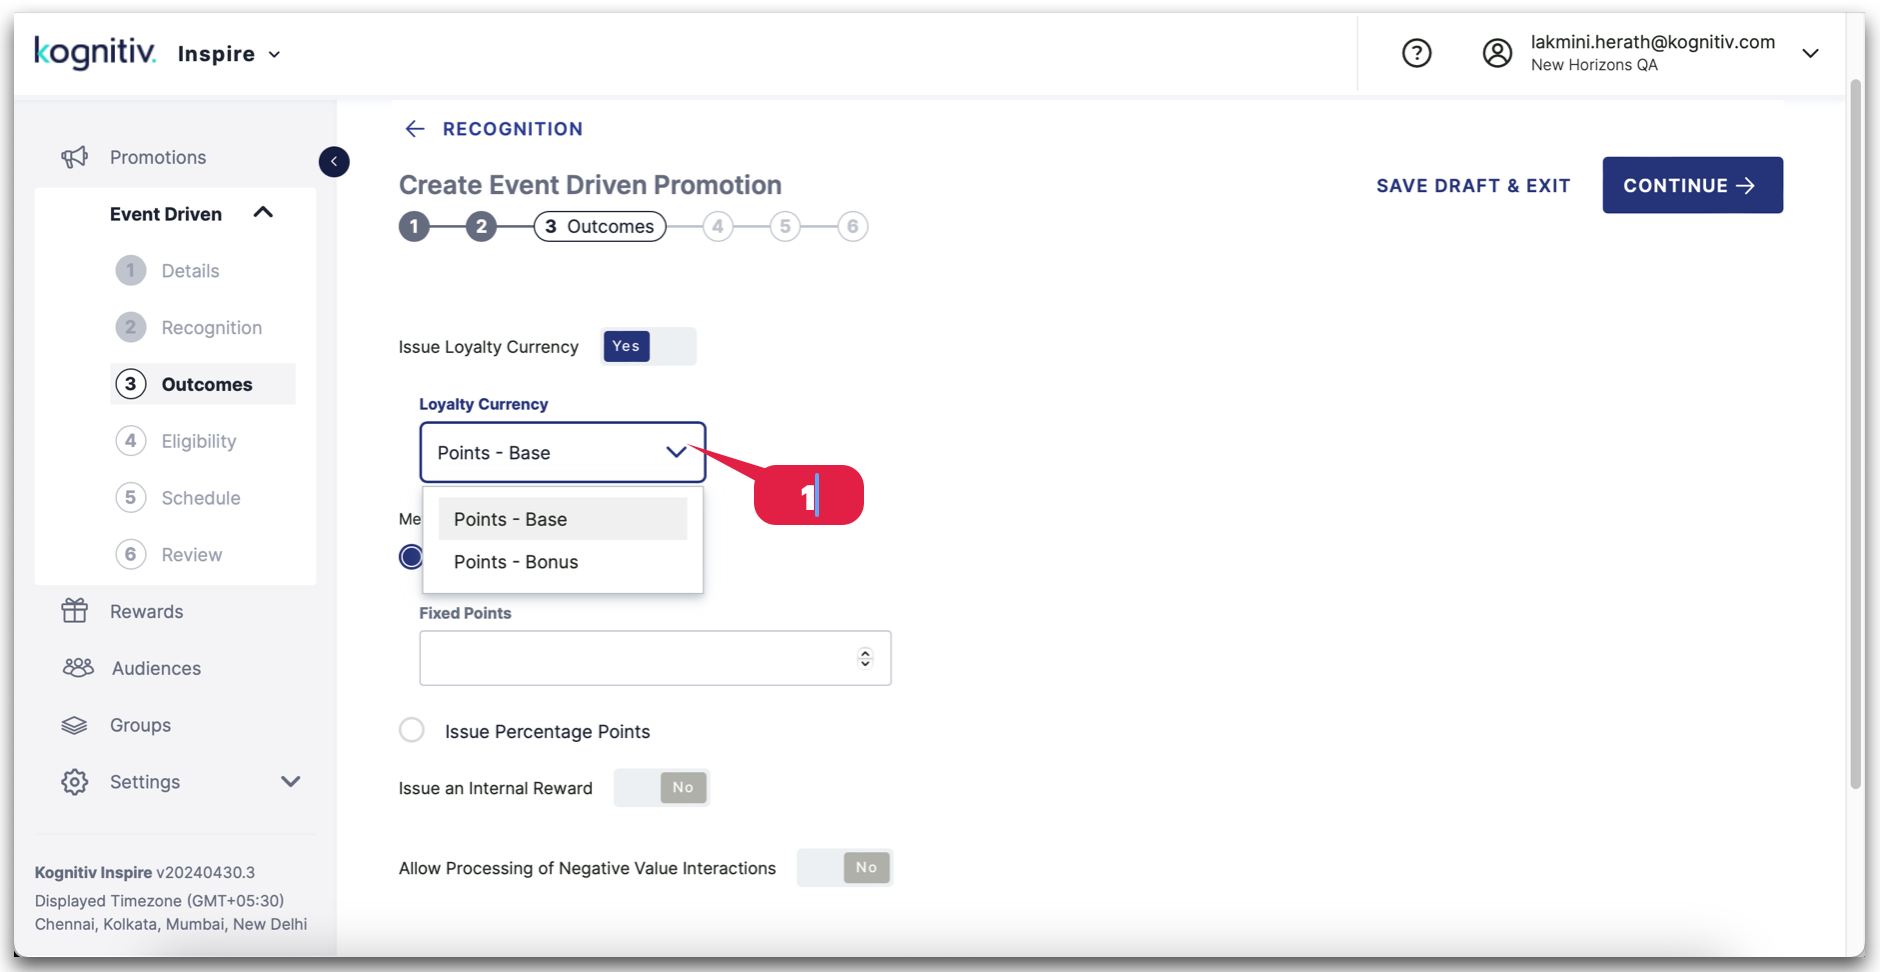
- Base Points:Base points are the fundamental points or rewards earned by a customer through regular, routine transactions or interactions with a business. These are typically tied to basic activities such as making purchases, using services, or engaging with the brand in standard ways. For example, a retail loyalty program, a customer might earn base points for every dollar spent on purchases. These points form the foundation of the loyalty currency and are accrued through regular customer activity.
- Bonus Points:Bonus points are additional points awarded to customers under specific promotional or incentive conditions. These points are extra rewards given on top of the base points and are often used to encourage specific behaviors or activities that the business wants to promote. For example, a company might offer bonus points for making a first-time purchase, participating in a special promotion, or reaching a certain spending threshold within a specified time frame. Bonus points provide an extra incentive for customers to take advantage of specific opportunities or engage in targeted activities.
2. Select the method of issuing points by choosing between the 'Issue fixed points' or 'Issue bonus points' radio button.
- Fixed Points:With fixed points, customers earn a set number of points for each purchase or specified action. For example, a loyalty program might offer 1 point for every $1 spent. These points accumulate over time and can be redeemed for rewards, such as discounts, free products, or other perks.
- Percentage Points:Percentage points, on the other hand, involve rewarding customers based on a percentage of their total purchase amount. Instead of earning a fixed number of points per dollar spent, customers earn a percentage of their purchase total as points. For instance, a loyalty program might offer 5% back on every purchase. This means if a customer spends $100, they would earn 5 points (assuming 1 point is equivalent to $1).
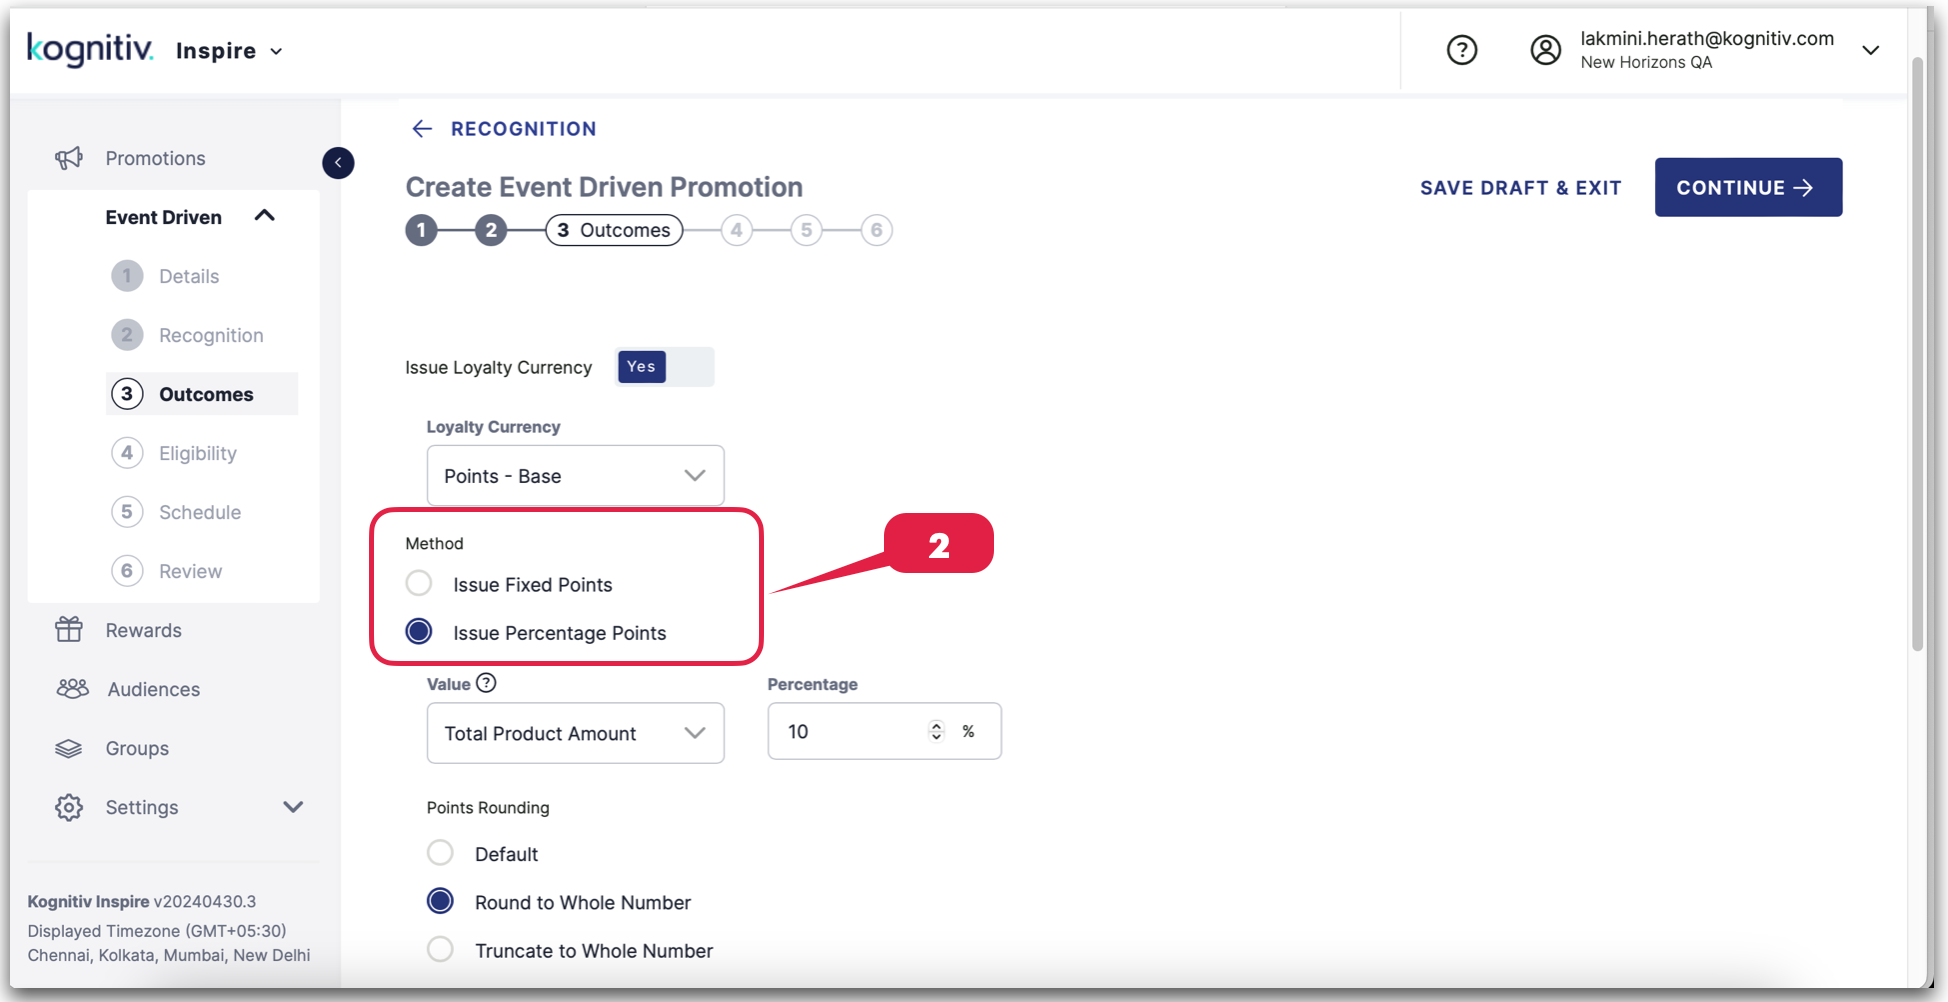
3. If you've opted to issue fixed points, specify the exact number of points.
If you've selected percentage points, indicate the percentage. Note that in the section indicated with an arrow, you have the option to utilize the default system-defined method, round the value to the nearest whole number, or truncate to the nearest whole number when issuing percentage points.
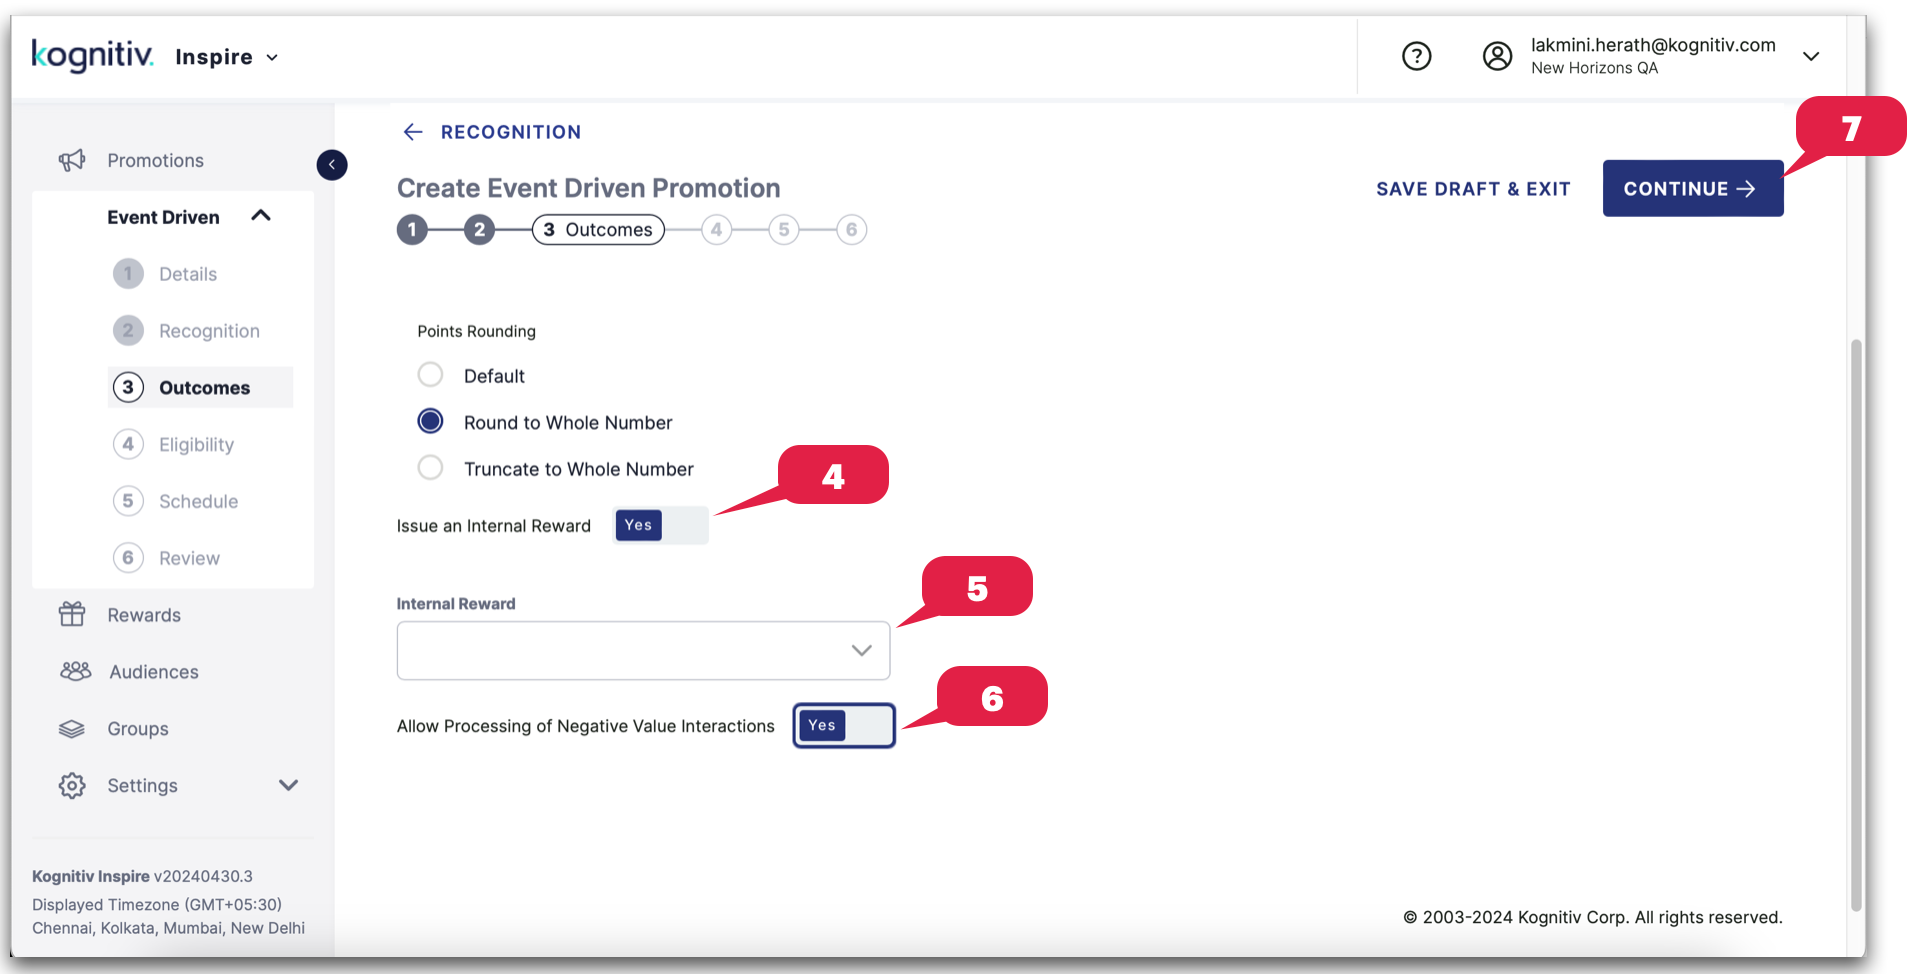
4. Toggle the switch to "yes" if you wish to issue an internal reward for the promotion.
5. Choose the internal reward from the provided list.
6. Toggle the switch to "yes" if you want to enable negative value processing for the promotion.
7. Click "Continue" to navigate to the "Eligibility" segement.
Allow processing of Negative Value Interactions
Negative value processing toggle in event-driven promotions enables the consideration of negative values within promotions. Specifically, it allows for the activation of promotions even when customers accumulate negative values, such as through returns of goods. However, it's important to note that negative values are typically associated with a selected set of goods, as not all purchased items can be returned to generate negative values.
This toggle essentially permits promotions to be triggered even when customers incur negative values, ensuring that these events are taken into account in promotional activities. It acknowledges the dynamic nature of customer interactions, including returns and adjustments, and incorporates them into the overall promotion strategy. By doing so, businesses can maintain flexibility and responsiveness in their promotional efforts, accommodating various customer behaviors and transactions.
Eligibility tab: (For Event Type: Reward Issued)
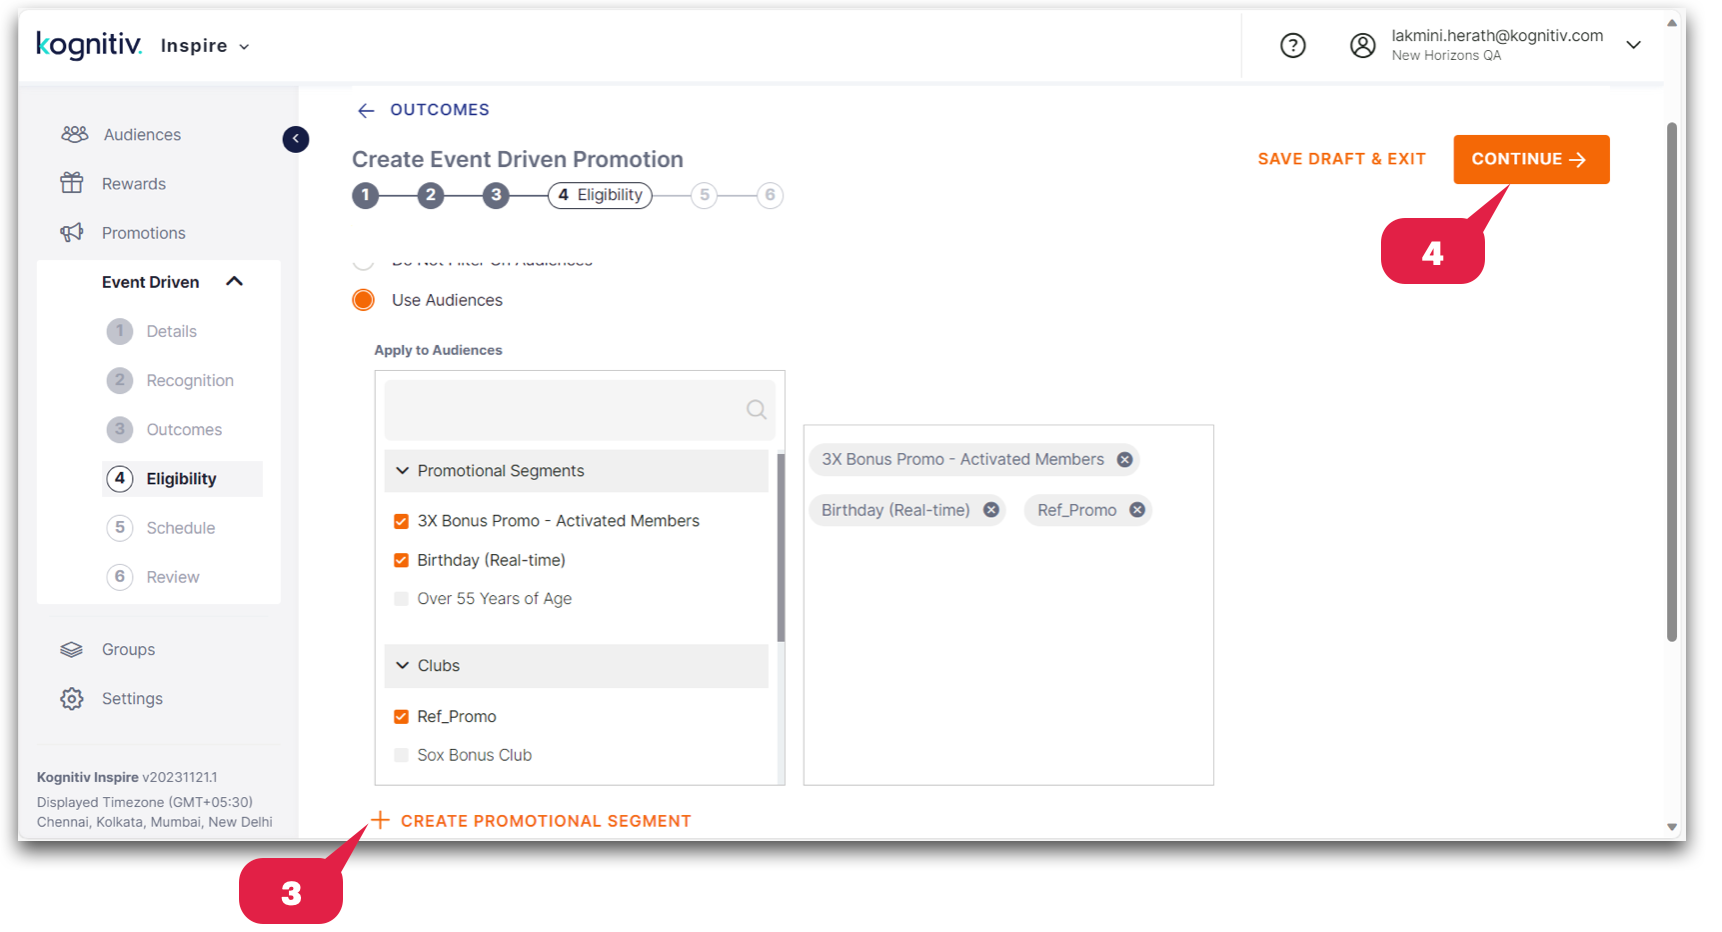
4: Opt for "Do Not Filter On Audiences" if you prefer not to target the promotion for a specific audience. Alternatively, choose "Use Audiences" if you want to specify and target the promotion for a particular audience. If you selected "Do Not Filter on Audiences," proceed directly to Step 6. If you chose "Use Audiences," continue reading.
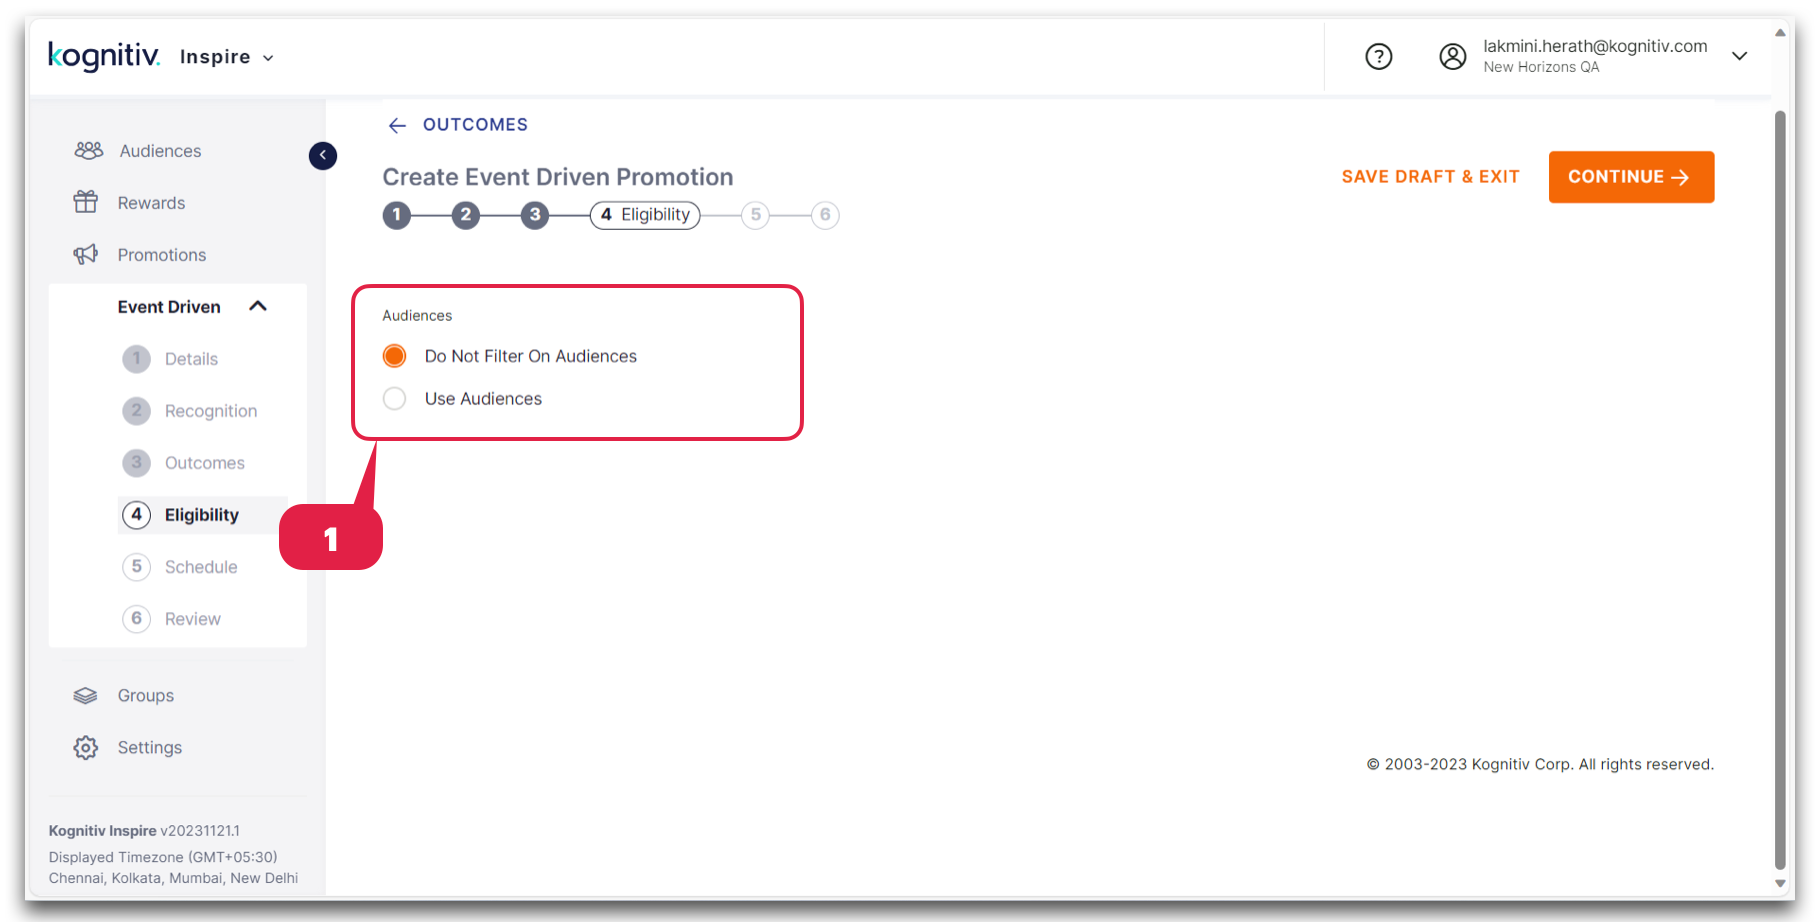
Audience refers to a specific group of customers who share certain characteristics or behaviors. When you are given the option to "Use Audiences”, it means you can customize or specify the promotion to be directed at a particular segment of your customer base.
For example, an audience might be defined by factors such as:
- Demographics: Targeting customers based on age, gender, income level, etc.
- Behavioral Patterns:Focusing on customers who have specific purchasing habits, engagement levels, or interaction histories with the brand.
- Geographic Location:Targeting customers in a particular region or location.
- Membership Tiers:Customizing promotions for specific loyalty program tiers.
2. Select the specific audiences from the list on the right. The selected choices will appear in the box to the right. To remove an audience from the selected list, click on the "X" icon associated with each audience.
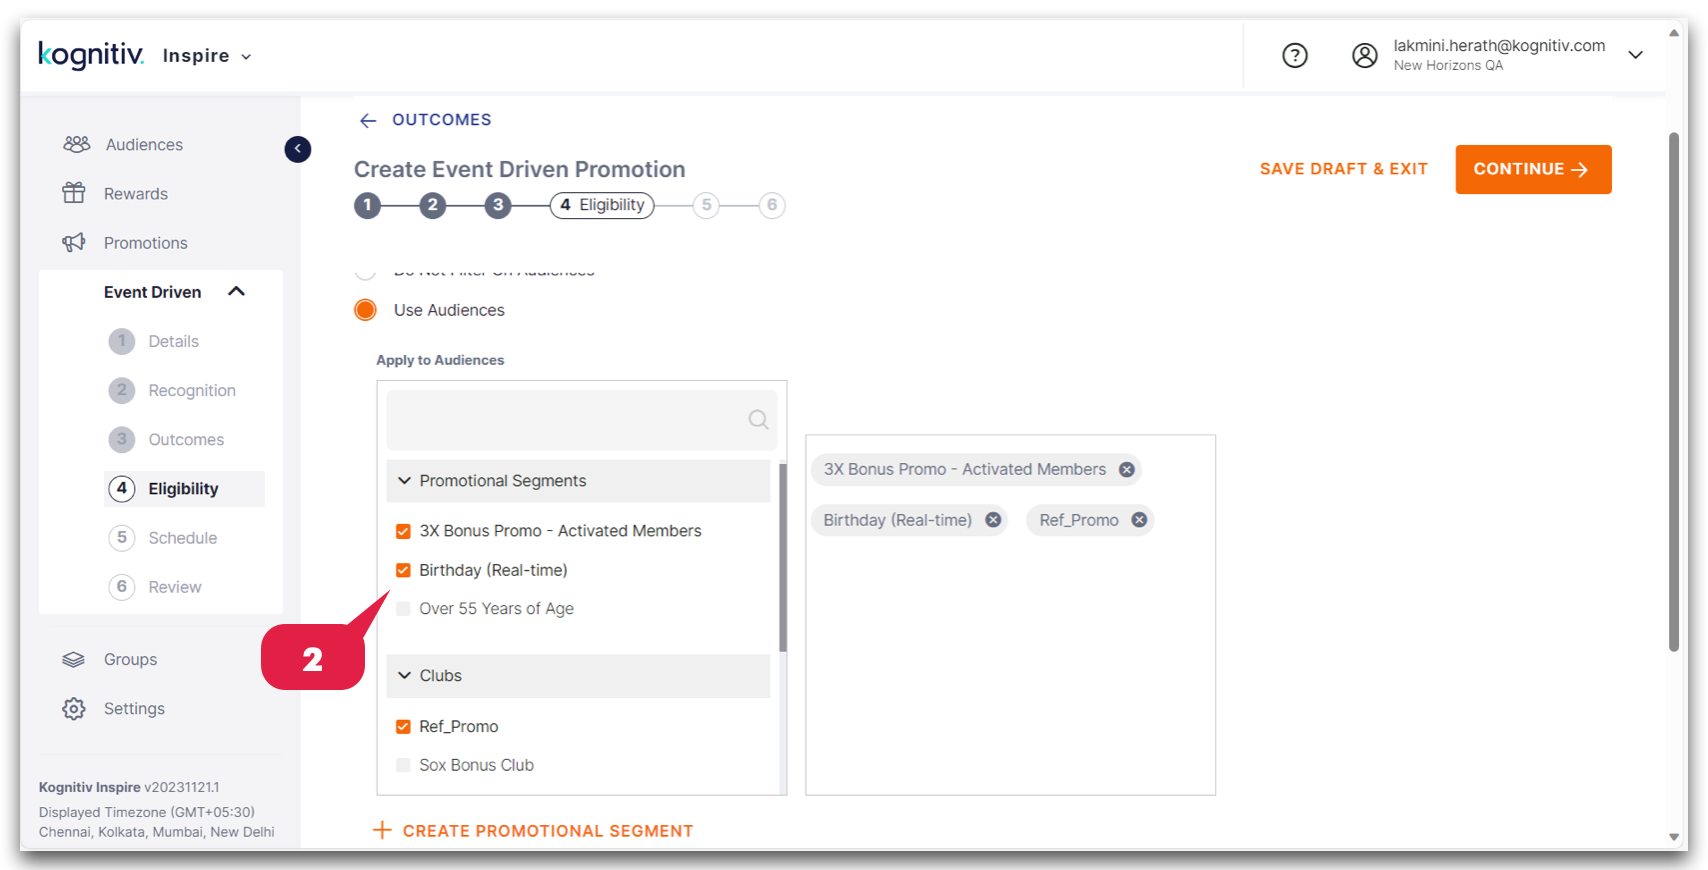
3. Optionally, you can create a promotional segment by selecting the "Create Promotional Segment" button.
4. Select "Continue" to proceed to the "Schedule" tab.
Schedule tab: (For Event Type: Reward Issued)
The Reward Issued Event Type does not currently support a scheduling feature.
Schedule tab (For Event Type: Member Interactions)
If you've previously chosen "Member Interactions" as the Event Type in the Recognition tab, you can now set the schedule for the event-driven promotion in the Schedule tab.
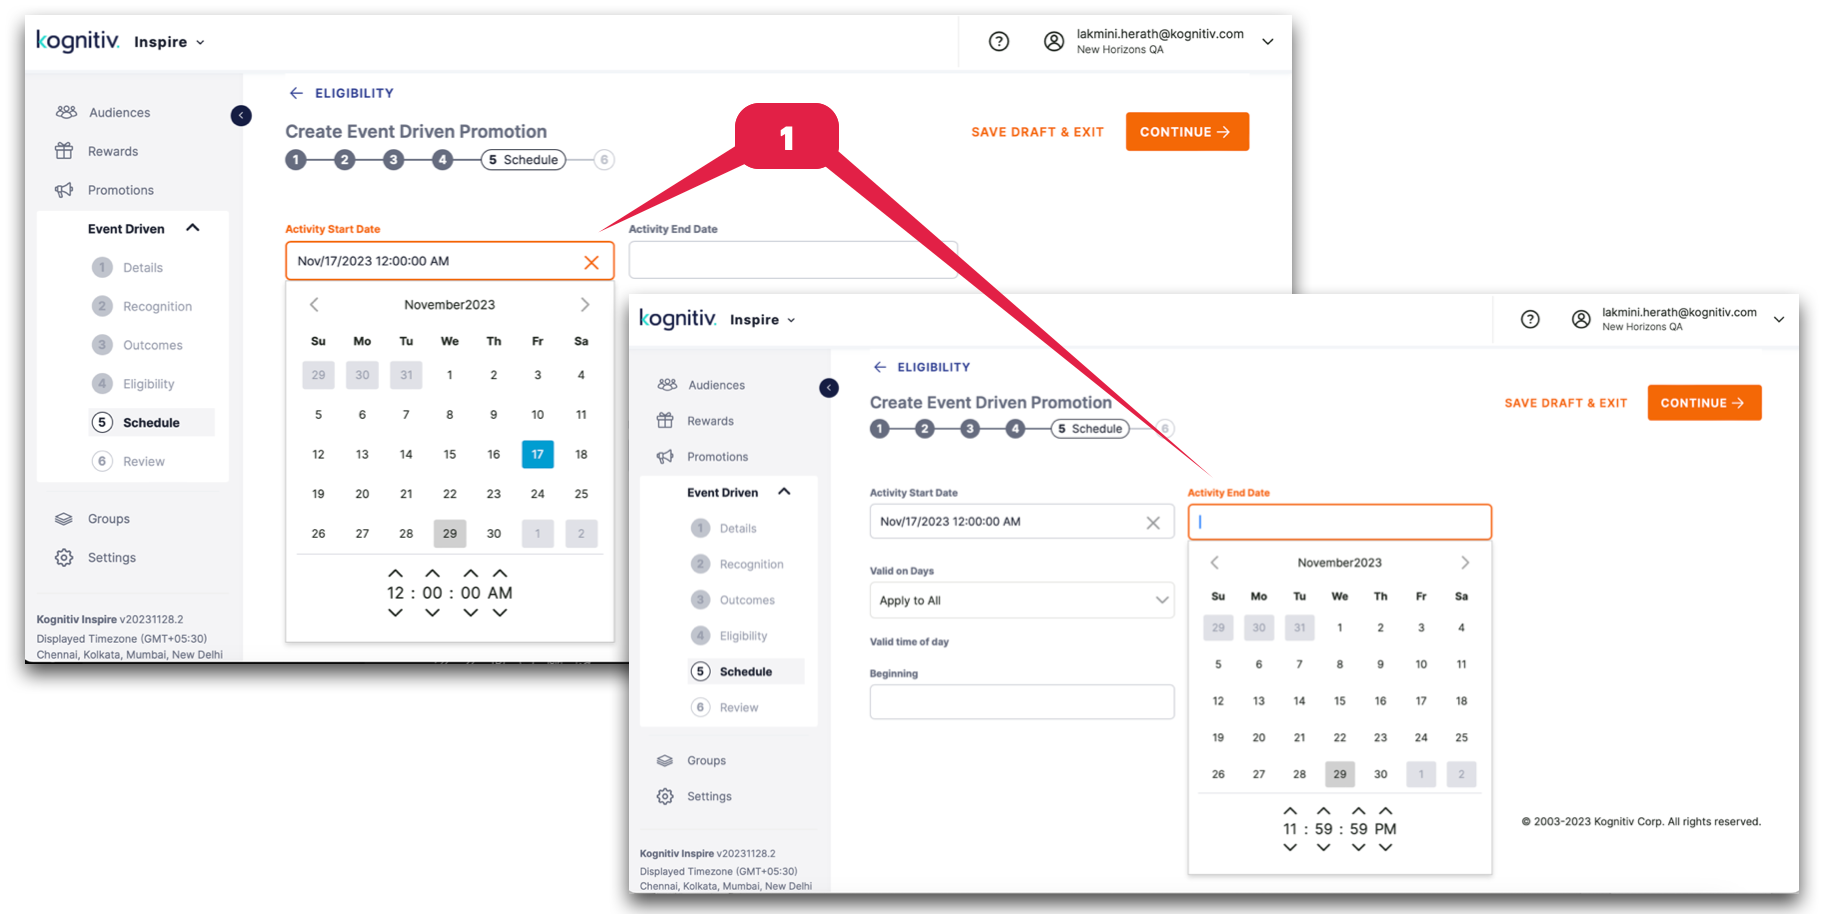
1. Choose both the Activity Start Date and the Activity End Date by using the pop-up calendars provided for each.
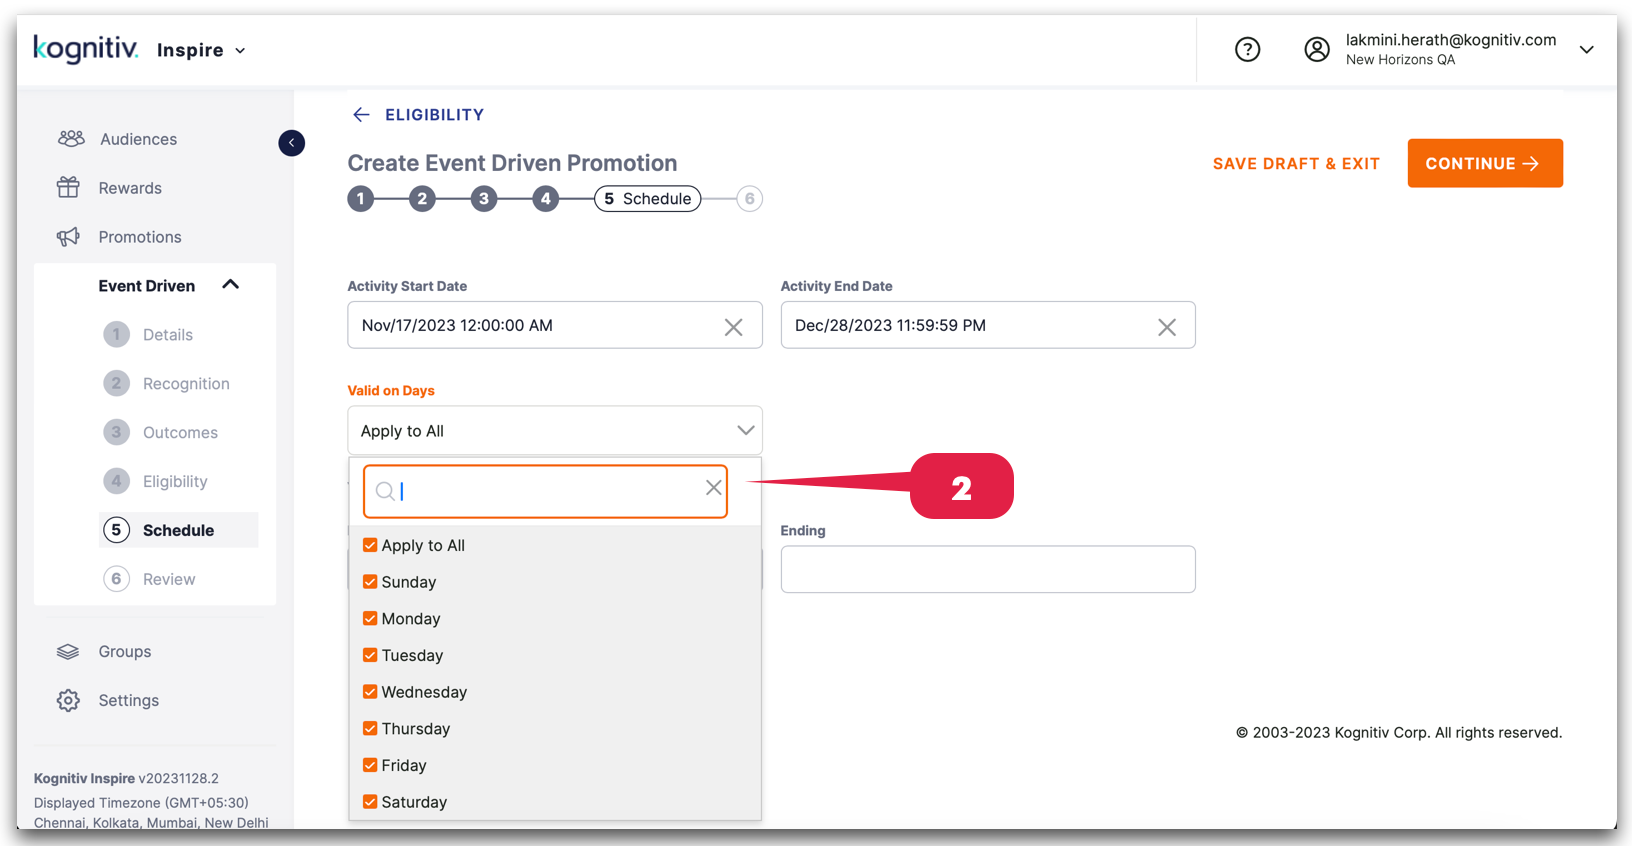
2. Choose the days on which the promotion will be applicable by selecting them from the "Valid on Days" dropdown menu.
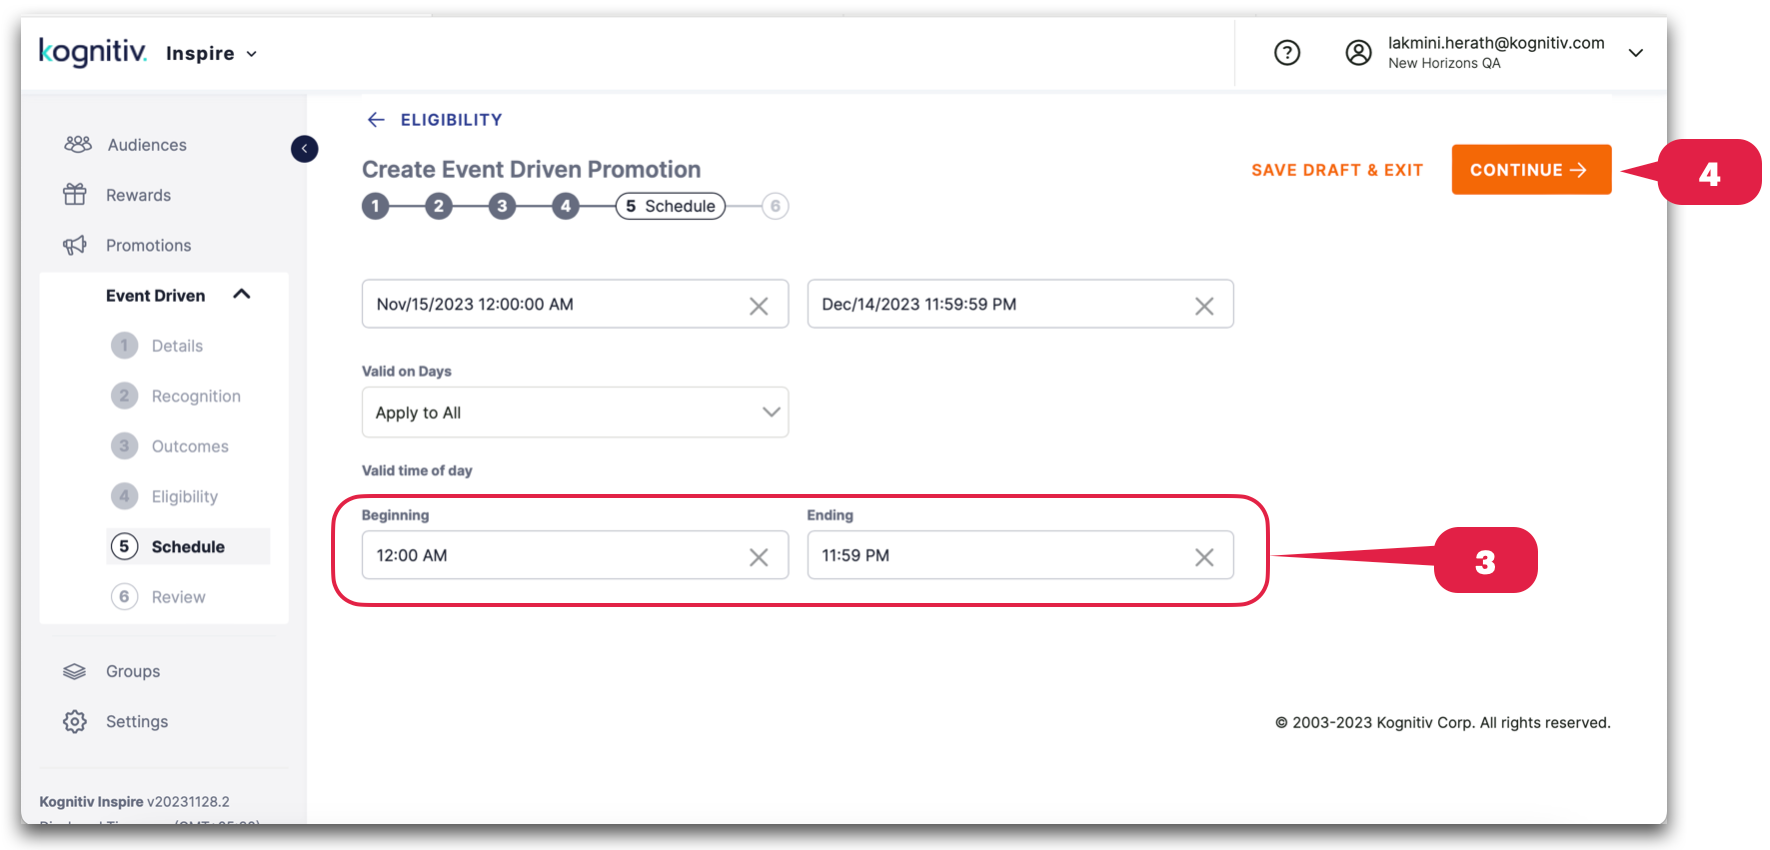
3. Choose the specific time duration for the promotion by selecting it from the designated "Beginning” and “End" options.
4. Select "Continue" to proceed to the "Review" tab.
Review tab: (For Event Type: Reward Issued)
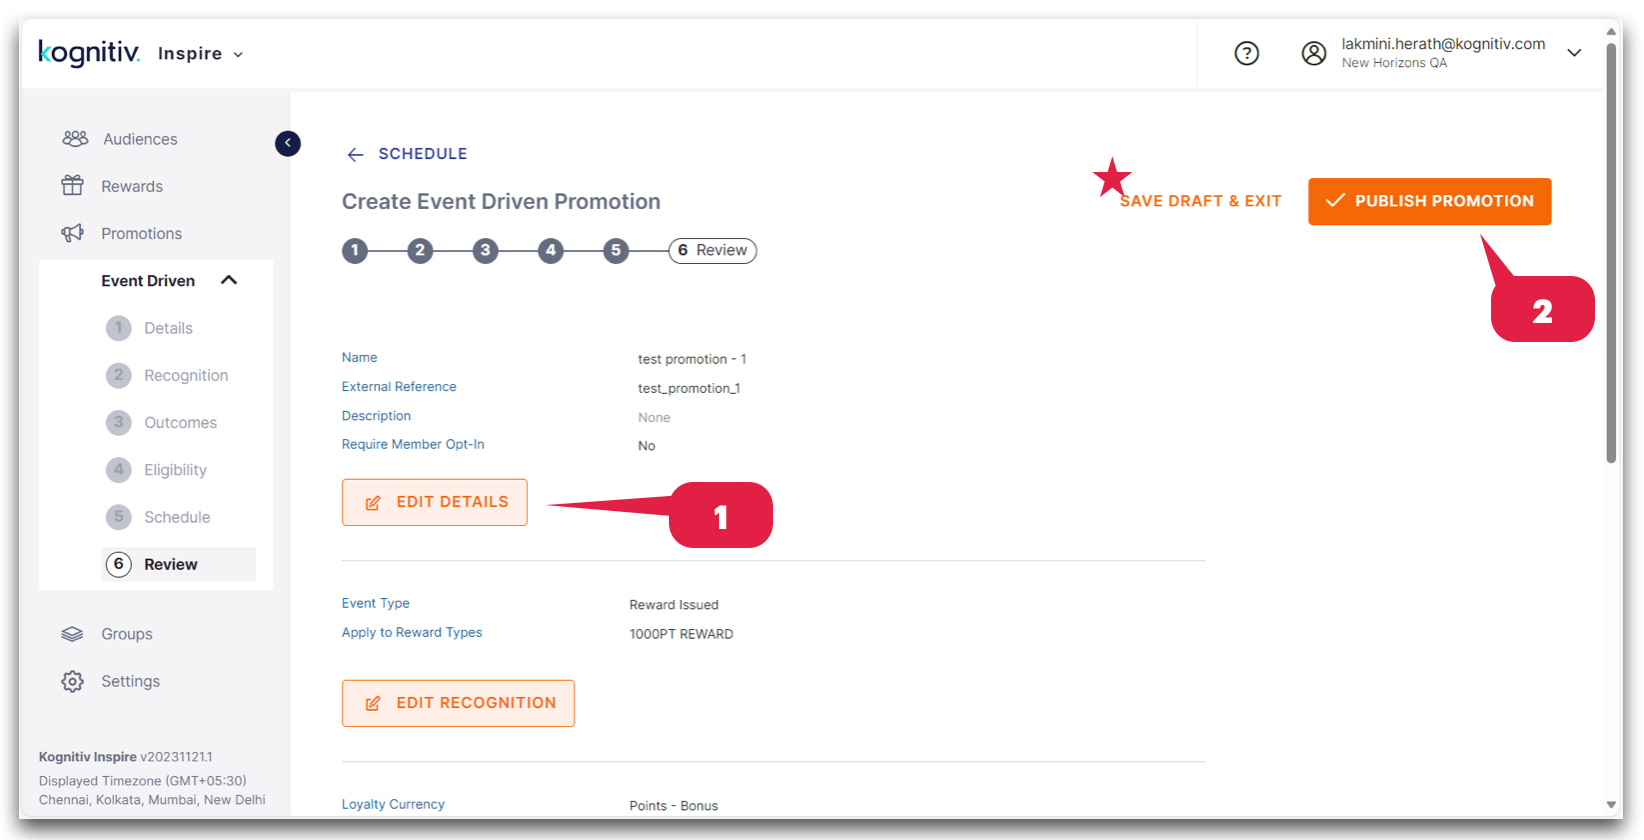
1. Use the review buttons allocated to each section in the "review" tab to edit any previous information entered.
2. Click the "Publish Promotion" button to make the promotion live.
*Alternatively, you have the option to "Save Draft and Exit" if you wish to edit the promotion at a later time.
