If you are interested in learning how to create event-driven promotions for the "Reward-issued" event type, please click here.
You are now on the dedicated page that walks you through creating an event-driven promotion specifically for the "Member Interactions" event type. By this stage, you should have completed the preceding steps outlined on the Event-Driven Promotion page and chosen "Member Interactions" as the event type for the promotion you're building. Please refer to the following screenshot for visual guidance.

Click here to refer to the preceding steps in this process.
1. Specify the interaction types to which the promotion should be applicable by choosing from the options available in the "Apply to Interaction Types" dropdown menu.
2: Specify the interaction types to which the promotion should be applicable by choosing from the options available in the "Apply to Interaction Types" dropdown menu.

Product Groups
For instance, if the interaction type involves product-based activities like a general merchandise purchase, the option to "Use Product Groups" may be available. This choice allows users to specify or narrow down the promotion's applicability to particular categories or groups of products within their inventory.
On the other hand, for non-product-based interaction types, such as "Location Admission," the Product Groups section may not be presented.
In essence, the availability of the Product Groups section is contingent upon the selected interaction types, providing users with a tool to tailor their promotions based on the nature of customer interactions within the loyalty program.
3. Choose between the options "Do Not Filter on Products" or "Use Product Groups."

If you've selected the "Do Not Filter on Products" radio button in the "Product Groups" section or if you haven't been prompted to enter information in the Product Groups section, proceed directly to Step 13. If you have chosen the "Use Product Group" radio button, refer to Step 12.
4: Choose the product groups and specific products to which you want the promotion to apply from the box on the left. The items you've selected will be displayed in the box on the right. If you need to remove any selected product groups or individual products, click the "x" icon associated with each product or product group.
5: Click the "+ Create Product Group" button if you want to create a new product group on the go.

Threshold
6: Decide between "Set a Threshold" or "Do Not Set a Threshold."

Promotion Thresholds in Event-Driven Promotion bring in a flexible filtering option, enabling the inclusion of minimum and maximum spend criteria. Now, you have the capability to define either a minimum, a maximum, or a range of spending, ensuring customers are rewarded upon reaching the designated threshold/s.
This functionality empowers the creation of targeted promotions with specific spending thresholds for both product groups and overall transaction amounts. For example, promotions can be configured to grant bonus points to members based on their expenditures within a specified range on particular product categories. Furthermore, it facilitates promotions that establish thresholds on the overall transaction spend, allowing for multiple awards within a single transaction.
7: If you opt for "Do Not Set a Threshold," proceed to Step 15. If you choose "Set a Threshold," continue reading. Specify the spending range by defining the "Minimum" and "Maximum" values. Alternatively, you can set only one of these values based on your preference and promotion criteria.
8: If applicable, toggle the "Recognize Multiple Times on Single Transaction" to "Yes." It's important to note that this toggle can only be enabled when both "Minimum" and "Maximum" values are defined in the "Range" section (Step 15).

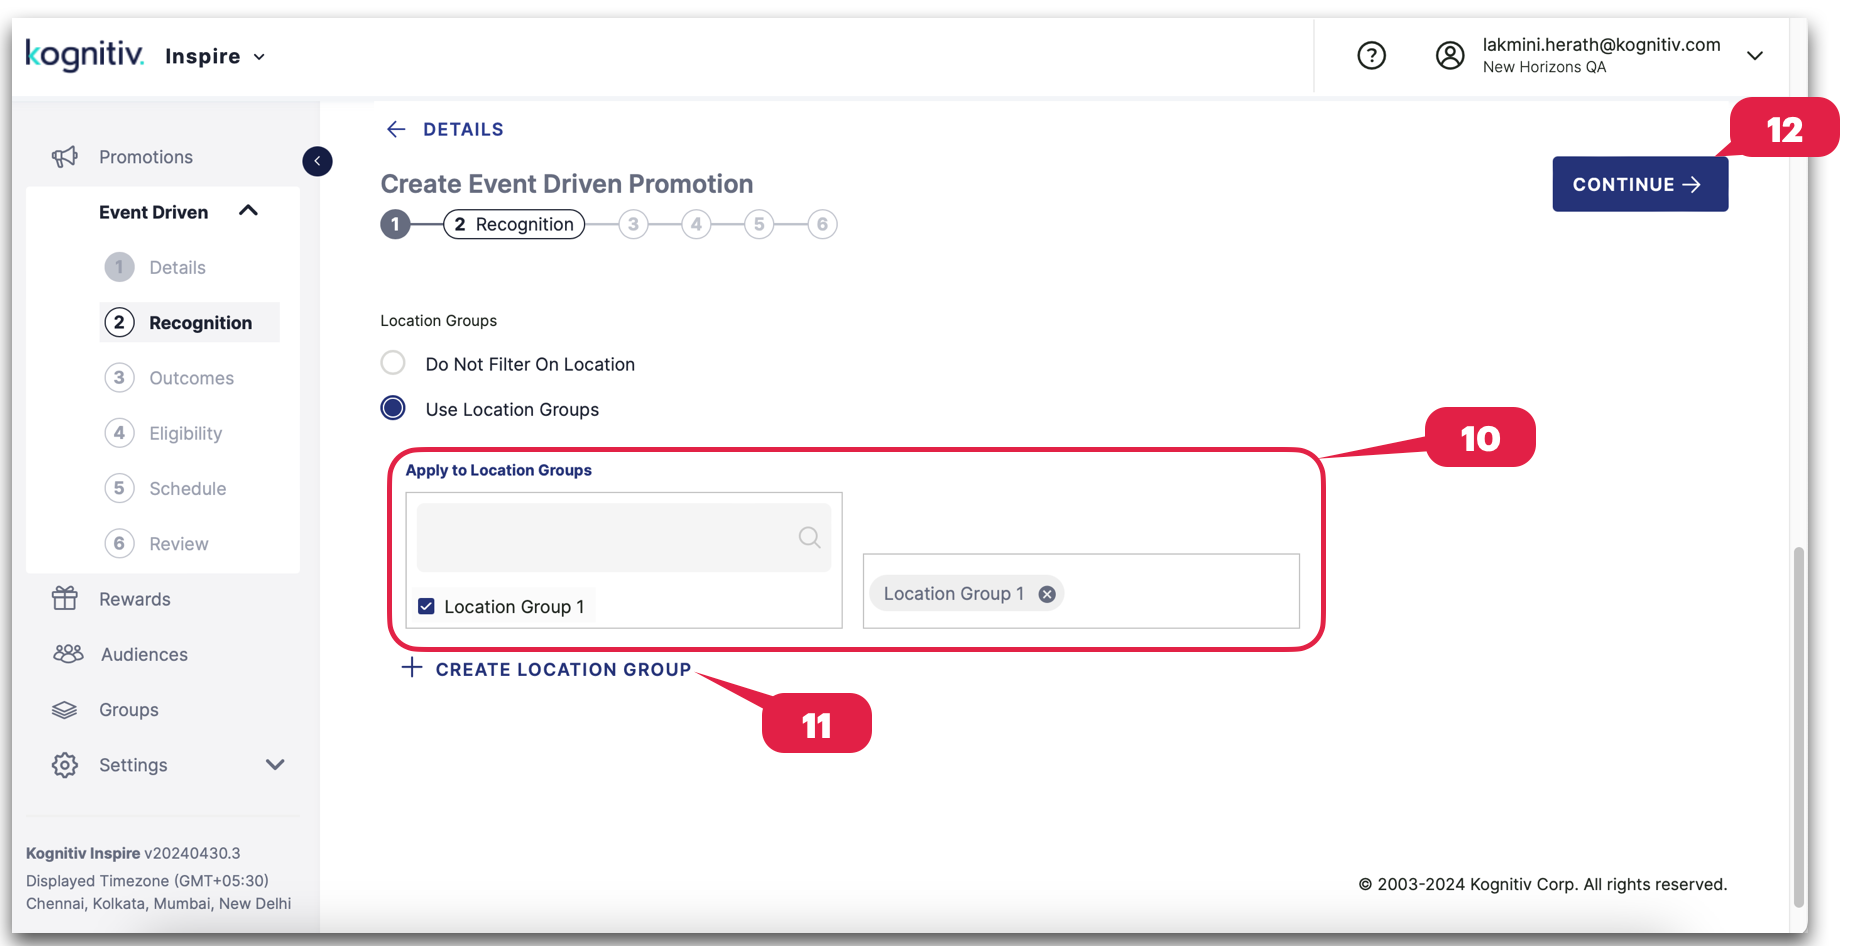
Location Groups
9: Choose between "Do Not Filter on Location" or "Use Location Group" based on your preference. If you opt for the "Do Not Filter on Location" option, proceed directly to Step 3. However, if you select "Use Location Groups," continue reading.

10: Choose the pertinent location groups from the left-hand box. Utilize the search bar to find specific location groups. The selected location groups will be displayed on the right-hand box.
*You can easily remove any chosen location group by clicking the "x" icon next to each item.
11. Select the "+ Create Location Group" button if you want to create a new location group.
12. Select "Continue" to proceed to the "Outcomes" tab.

Please click here to go to the page that explains the next steps in creating an Event-Driven Promotion.
